Some tips on making a scrapbook
Some tips on making a scrapbook.
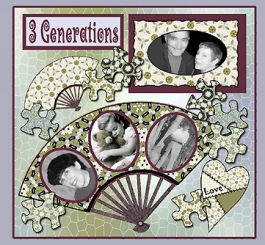
Photo albums display your photos and protect them quite well in most cases, but a scrapbook can tell a story that is more than unforgetable.
Your scrapbook can not only display your precious photos,love note, theatre tickets and special events but your choice of colours, and patterns as your background paper can also add another dimension by setting the mood of the event.
.Some tips on organizing your photos.
Most of us have boxes of photos, old albums that need re-vamping and when we think of sorting them out into chronological order for our scrapbooks the task seems neverending. If this is the case, try sorting them out into themes such as: School days, Holiday trips, Family vacations, Camping trips, School renuions, Christmas partys, Birthdays.
When making up the scrapbooks, choose your background paper to suit each theme. For instance, your school days scrapbook can be made up using those old school colours as the background paper. Christmas scrapbooks can have red and green colours, and holiday scrapbooks can have colours of the beach for those holidays by the seaside with shells and pails as a theme, while scrapbooks of holidays in France can have background with faint pictures of the landmarks of France.
When you have the pages made up for each theme, you can make a "Cover Page" for each them to separate each from the other. Keep you cover pages simple with just a single photo and the date or year and of course the location or event.

Cutting Tools for Scrapbooking
You will also need a pair of sharp, pointed paper scissors for cutting smaller bits and fancy shapes. Choose a pair that you feel comfortable with and has very sharp points for getting into tight corners and for cutting small detail and make sure that they are only used for cutting paper.
Fancy scissors that cut novelty edges are also useful for cutting pretty scallops, fringes, pinking, deckle etc. on the edges of paper and cardstock.
A craft knife or scalpel is also handy for cutting out lettering. Use this with a self healing cutting mat alsong with a metal ruler for cutting straight edges. Scalpels and craft knives should be very sharp for cutting accuragely so keep them in good nick and protect them with a protective guard when not in use. Change the blades often.
Scrapbooking Tips

Make your memories jump off the page with coordinating frames, backgrounds, tags and embellishments. Mix stripes with patterns but keep to the same colour scheme.
Add button trims ... I posted heaps of button prints for you to use. Also look for "Scrapbook Sets" in the browse list ... (in the sidebar) Look for a link that looks like this. Scrapbook Set 01 to find colour and pattern coordinated print sets.
Take you time ... you will see the rewards later.
Eyelets, Charms and Brads.
Eyelets are pretty metal rings with a shaft or tube that you put through a hole of your pages and is then flattened out on the back side with a punch or pliers.
You will need a small hammer, a hole punch, and an eyelet punch in the appropriate size to flatten out the shaft of the eyelet.
Brads are decorative split pins that also come in a variety of styles and metal types. They have sharp points that you can push through your paper or cardstock. You then open the two prongs of the split pin in opposite directions to secure the brad to you cards or pages.
Nailheads can be used in the same way as eyelets but have a flat head without a hole and look somewhat like a gold or silver stud. They come in a variety of styles and metal types like gold, silver, copper etc.
Then there are metal charms which can be glued on with acid-free liquid adhesive. They come in a huge variety of shapes and size from wedding bells, anchors to simple shapes such as stars, moon shapes, circles etc.
Using fabric to decorate your scrapbook and cards.
Beige Lace - Doilies
Another way to attach pieces of fabric to cardstock is with glue or you can even use your sewing machine, or needle and thread to secure the pieces to the card.
Eyelets or brads can also be used to anchor the fabric to cardstock.
Experiment with different fabric textures such as cotton, wool, synthetic fabrics, burlap, lace etc.
Adhesives for Scrapbooking and other Paper Crafts
2. Double sided adhesive tape comes on a roll just like ordinary sticky tape or you can get a roll or pre-cut square in a dispenser that can be peeled off and place in position individually. These are sometimes called photo tabs. This kind of adhesive is stronger than roll-on adhesive and are are best used for flat, straight surfaces.
3. Glue dots are used to add dimension to a scrapbook, or greeting card page. These are globules of glue that come in a variety of different thicknesses on a paper roll or sometimes on a sheet. They are also available as double-sided adhesive foam shapes or tape. You use these to make the cardstock, embellishment, or paper decoration sit up above the surface of the page or greeting card.
4. Acid-free liquid adhesive can be used for attaching metal embellishments and other odds and sods. It gives extra strength even if only a few points of the adhesive are used. This is great for oddly shaped pieces.
Fw: Watch this drummer.
| |||||||


