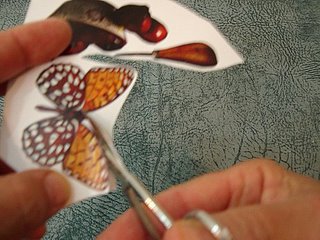
How to cut out prints for doing decoupage.
MASTERING THE ART OF CUTTING
Beautifully cut prints will enhance the loveliness of your finished work. Poor cutting cannot be remedied so practice your cutting often. Try to cut every day. If you have nothing important to cut, try junk mail or magazine pictures. Start with simple designs and as you gain confidence tackle more difficult ones.
ORDER OF CUTTING
Cut out all the internal blank parts of the design first. This gives you more area to hold on to and allows more control. When cutting these inner bits cut in a clockwise direction. Start the cut by poking a hole through the middle of the area then insert the point of the scissors into the print from the back. The printed surface should be facing you, the scissors under the print.
When all the inner bits have been removed, cut around the outer edges working in an anti-clockwise direction.
When cutting delicate bits that would tend to bend and maybe even break off, it is a good idea to cut ?bridges? to help hold the cutting in shape until you are ready to paste it on your object. Draw them in with a dotted line before you begin the actual cutting. This helps you not to forget to cut in the bridge. You can use as many bridges as you feel comfortable with.
Cut away the bridges just before applying the paste or alternatively, and especially if the print is very fragile, apply the glue to the object, then place the dry cut print on the glued surface and gently wipe away the excess.glue with a damp sponge. It is a good idea to have about a dozen or so small pieces of sponge previously dampened and on hand when using this method. As you use each piece, put it into a container of water so the glue does not dry and spoil the sponge. At the end of the project wash the sponges

No comments:
Post a Comment
Please note: Spam messages will not be published!